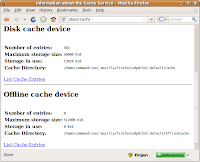
Wipe Ubuntu Firefox cache

Locate your Firefox cache by entering "about:cache" in your browser address bar.
Note: The cache folder location (eg. u0p8r5n2.default) is randomly generated and different from system to system.
Navigate to both "Cache" and "OfflineCache" folders to wipe by running the "sudo srm -rllv *" command.
There are other traces of your surfing history (eg. search keywords, files downloaded, URLs entered) stored by your browser. To wipe these, navigate to your cache folder and securely delete all files with the extension .sqlite.

commandrine@bridge:~/.mozilla/firefox/u0p8r5n2.default$ sudo srm -rllv *.sqlite
Using /dev/urandom for random input.
Wipe mode is insecure (one pass [random])
Wiping content-prefs.sqlite * Removed file content-prefs.sqlite ... Done
Wiping cookies.sqlite * Removed file cookies.sqlite ... Done
Wiping downloads.sqlite * Removed file downloads.sqlite ... Done
Wiping formhistory.sqlite * Removed file formhistory.sqlite ... Done
Wiping permissions.sqlite * Removed file permissions.sqlite ... Done
Wiping places.sqlite * Removed file places.sqlite ... Done
Wiping search.sqlite * Removed file search.sqlite ... Done
Wiping urlclassifier3.sqlite * Removed file urlclassifier3.sqlite ... Done
commandrine@bridge:~/.mozilla/firefox/u0p8r5n2.default$

Ubuntu firewalls

I use Firestarter to manage my firewall on Ubuntu. It is easily installed from Ubuntu's "Add/Remove Applications" window. Launch Firestarter from the menu and the wizard is triggered when starting the program for the first time.

Follow the instructions in the wizard and Firestarter will be started soon after. Start adding rules to permit inbound and outbound traffic. Firestarter allows advanced configurations to restrict ICMP types and drop unwanted packets.

After reading rave reviews about ufw (Uncomplicated firewall), I decided to evaluate it. Installed ufw and gufw using the "apt-get" command. Launched gufw from the menu. ufw is disabled by default. Enabled the firewall from the GUI and started adding rules to permit traffic.

My verdict? I'm not sure what all the buzz is about. Firestarter is easier to set up, intuitive to use and has more powerful features.

File carving part II

I posted about file carving previously. I recently discovered a manual way of carving files out of network packets whilst writing a new article. Locate the file you want to extract from your captured packets in Wireshark. The suspicious file I want to extract is shown as "malicious.doc" in the packet stream but you can tell that it is actually an executable file from the ASCII values of "MZ" at the beginning of the file and its hexadecimal equivalent of "0x4d0x5a". Right click on the line containing the filename you want to export and select on "Export Selected Packet Bytes". The bytes associated with the file will be opened in a new window. Save the bytes and you can examine them in a hex editor.

Converting raw packets to text

Had a requirement to convert pcap files to text because Splunk's Sales Engineer advised me to do so before Splunk can index information from packet captures.
Tshark is the tool to fulfill this need. From Windows:

C:\Program Files\Wireshark>tshark -r c:\Forensic\network.pcap -T text > c:\Forensic\network.txt

From Ubuntu:

commandrine@bridge:~$ tshark -r network.pcap -T text > network.txt

By default, Tshark only extracts one line summaries of the packets from your packet capture. Specifying the switch "-Vx" will include packet details and Hex/ASCII information from your pcap file. A word of caution, the text output from using the "-Vx" switch will result in a text file that is exponentially larger than the original pcap.

Splunk on Ubuntu

Splunk is a search technology that can be used to analyse enterprise data such as logs from security devices and even pcap files. I've heard a lot about it and decided to evaluate the enterprise edition.
Reading their FAQ and documentation, it is pretty obvious that Splunk is Windows centric. Installing Splunk on Ubuntu was a headache and that's why I decided to document the installation process and getting started with Splunk.

1) Download Splunk (Debian package).
2) Install Splunk in Ubuntu. Splunk will be installed and located in /opt/.
3) Create a file called "splunk.license" on your desktop*. Cut and paste your evaluation license key from Splunk's website into this file. Move the file from your desktop to /opt/splunk/etc/.
4) Start Splunk from the terminal window by entering "sudo ./opt/splunk/bin/splunk restart". Acknowledge the license agreement by entering "Y".
5) Splunk will start and can be accessed via your browser at "http://localhost:8000". The username is "admin" and initial password is "changeme".

You are good to go!!!

* Turns out that you can skip this step by downloading your splunk.license file from the Splunk website after logging to your account and accessing the licensing section.

Folder/file secure deletion

The secure deletion tools that I recommended previously are effective when wiping whole drives or partitions but cannot be used against individual folders or files.
One tool that can tackle this is "secure-delete". I use it to wipe files in my Ubuntu Trash.

commandrine@bridge:~$ sudo srm -rllv .local/share/Trash/files
Using /dev/urandom for random input.
Wipe mode is insecure (one pass [random])
Wiping .local/share/Trash/files DIRECTORY (going recursive now)
Wiping Web hack.txt * Removed file Web hack.txt ... Done
Removed directory .local/share/Trash/files ... Done

Running "sudo srm -rllv *" from /home/commandrine/.local/share/Trash/files path works too.
Example deleting an individual file.

commandrine@bridge:~$ srm -rllv Desktop/clamtk_4.14-1_all.deb
Using /dev/urandom for random input.
Wipe mode is insecure (one pass [random])
Wiping Desktop/clamtk_4.14-1_all.deb * Removed file Desktop/clamtk_4.14-1_all.deb ... Done

Latest addition

This is the newest addition to my lab. Thanks to GC for his donation. I have started to make use of it by installing WebGoat on it.

WebGoat hacking posts coming soon.

Password reset vs cracking

I previously demonstrated Ophcrack which is a Windows password cracker that uses pre-computed hashes to match the password hash from the target machine's dumped SAM table. Password reset is as the name suggests substituting the password hash from the target machine's dumped SAM table so that you can stipulate the password that you wish to use.
My weapon of choice for password reset is Offline NT Password & Registry Editor. The tool's name is misleading as it supports newer OSs like XP and Vista. You can burn it into a bootable CD or utilize a boot disk. In my demo, I boot the target machine off a CD. I follow the tool's instructions before specifying a blank password. Once the new password is saved, I am able to enter the target system using a blank password.

The high res version of this demo can be downloaded here.

Each method has its pros and cons. Password cracking is time consuming but does not alert the adminstrator as the system password remains unchanged. Password reset is fast but is too obvious when the administrator cannot log into his system.

HTTPS is bad?

This article is 6 months in the making. I finished writing this article in November 2008. It took me 4 months to find an editor who would publish it and it was another 2 months before the article appears in print.
An excerpt from my published article on page 106.
"Hypertext Transfer Protocol over Secure Socket Layer (HTTPS) is a protocol that promises integrity of data transmitted over this channel and prevents prying parties from spying on the communication between two entities. Information security professionals constantly advocate the implementation of HTTPS within the enterprise to secure sensitive data and critical transactions... The employment of HTTPS is now universal and has created an illusion that HTTPS is trustworthy thus resulting in a blind eye turned to what traffic traverses over this “secure" protocol."

dnsaudit.py

 Since I was on a roll with Copilot, I decided to automate DNSSEC auditing with the following Python script. import subprocess import sys im...